
線材: Brown Sheep Cotton Fleece (80% 棉, 20% 美麗諾羊毛), 色號#225 橘粉紅 - 2.6 綑 (215yd [197m] / 100g)
圖樣: Zephyr Style
針號: 美制4號 3.5mm 輪針(領口,袖口,下擺鬆緊編),美制6號 4.0mm 輪針(衣身)
尺寸: S號,胸圍 84 cm/33 英吋, 長 51 cm/20 英吋
製作日期: 2008/09/10 - 2008/09/18
Yarn: Brown Sheep Cotton Fleece (80% cotton, 20% merino wool), color #225 Coral Sunset - 2.6 skeins (215yd [197m] / 100g)
Pattern: Zephyr Style
Needles: Addi Turbo US size 4 (3.5mm) / 24" (60cm) & 32" (80cm) for ribbing along the neckline, sleeves, and bottom hem, Addi Turbo US size 6 (4.0mm) / 24" (60cm) for body
Size: Size S, chest circumference 33"(84cm), length 20"(51cm)
Duration: 2008/09/10 - 2008/09/18
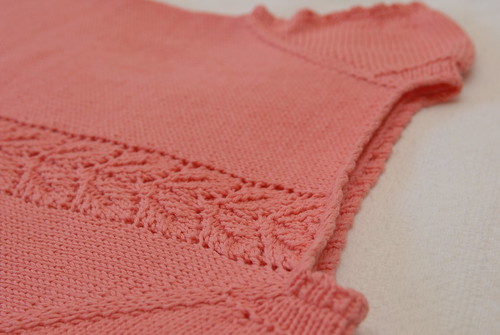
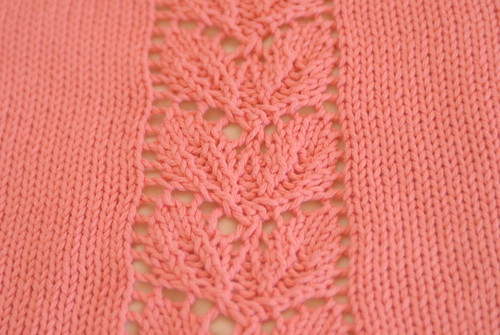
這件Rusted Root在美國網路上很多人都織過了,光Ravelry裡面就有765個成品,也難怪它受歡迎,這件織法簡單又快,實穿性高,從領口往下織,延著拉克蘭袖線加針,前片的葉子蕾絲是設計重點之一,讓人不至於因為平面編而覺得無聊,整件衣服採直筒輪編的方法,只有腋下"可能"需要縫合,超適合像我這種懶人或想嘗試從上往下織的新手的啦!
Rusted Root has been so popular in the blog world, there are 765 FO's in Ravelry alone. It has a simple construction and knits up fast. It is worked from top down in circular fashion. The increases are done along the raglan sleeve lines. The leaf lace panel just keeps it interesting amid the boring stockinette stitches. The only sewing required is at the underarm. This is a great project for a lazy bum like me or for someone who wants to try knitting from top down in circulars.

編織過程其實很順利,只有在第三天時因為太專心看CSI,在葉子蕾絲右側記號圈前加了一針,它是應該延著拉克蘭袖線記號圈處加針,蕾絲兩側也放記號圈,但只是用來標示蕾絲,啊我顧看電視碰到記號圈也沒看清楚就給它加針...又過了好幾段才發現...如果這一針是加在不顯眼的地方我可能就這樣算了,偏偏這一針是在胸口超明顯的地方...唉,只好拆了,當天的進度全部再見。不過自此之後,雖然還是邊看電視邊織,就沒再出錯了。
The knitting went pretty smoothly for this one, except on the third day. I was watching CSI, and somehow added one stitch to the right of the leaf lace panel. All the increases are supposed to be along the raglan sleeve lines where stitch markers were placed. There are also two stitch markers for the leaf lace panel to mark the beginning and the end. I was really into what was on TV and didn't look to see which stitch marker I was at, I did a M1 before the lace panel marker... And I did not realize it until several rounds later... If this mistake was at some inconspicuous places like the side seams, I would probably just let it go. But it was right on the chest, very noticeable. So, I frogged it, one day worth of progress for me. But after that, I did not make another mistake although I still knit with the TV on.
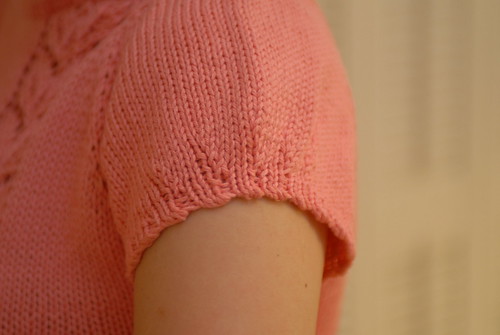
很喜歡它小包袖的設計
Love the small puffy sleeves
這件大部分都是按照織法來做,只改了下列幾個小地方:
- 腰身減針的地方,按照原織法應該是要減5次,我不想要太緊,只減了4次。
- 腰身兩側的減針它都是用k2tog,我覺得如果右側用k2tog,左側用ssk會比較好看。
- 腰身減針後原設計是直筒式織到下擺,不再加針,我怕這樣會太ㄅㄟ,覺得需要點空間來容納我的小肚肚,在減針後約6公分(2.5英吋)的地方開始做加針加了三次。
- 袖子部分 - 我在腋下多挑了三針,這樣洞比較小一點,藏線頭時把洞再拉小縫緊一點就好了。
I followed the pattern for the most part, with the following modifications:
- Waist shaping - For size S, the decreases are supposed to be 5 times. I thought that it might be too tight for me, and only did 4 times.
- For the waist shaping decreases, the pattern uses k2tog for both sides. I think it may look better if the right side uses k2tog, the left uses ssk.
- After the waist shaping, the original pattern has straight knitting to the hem. Again, I felt I needed a little bit more room for the tummy area, so I did 3 rounds of increases at about 2.5 inches (6cm) from the last decrease.
- Sleeves - I picked up 3 stitches at the underarm when joining to knit. The hole at the underarm would be a bit smaller and could be easily sewn when I weaved in the ends.
這組線也是買了很久了,堆在衣櫥裡大概有一年多了吧?沒辦法,想織的東西太多了,兩隻手實在是不夠用啊!
This is also one of the projects that sat in my stash for a long time, probably more than a year or maybe even a year and half. What's one to do? I have got only two hands, but so so many projects to do!





 Silver Belle Cardigan in Debbie Bliss Cashmerino Aran - 85%
 Rusted Root
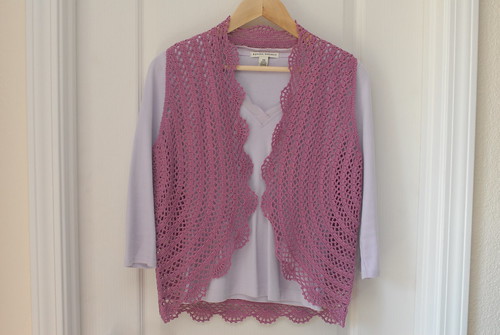
 Purple Crochet Bolero Vest 紫紅半圓鉤針背心
 Seascape Stole 海景披肩
 Anthropologie-inspired Chunky Knit Shrug 粗編小外套
 Long Lacy Vest 長蕾絲背心
 Cobblestone Pullover
 Lacy Babydoll Tunic
 Ruffle A-Line Tank
 Cream Lacy Half Sleeve Bolero
 VK Cabled Shrug
 Tweedy Diamond Cardigan
 Red Capelet 紅色斗篷


